You use Square to power your Point of Sale and QuickBooks Online for your accounting. Getting them talking can save loads of time and allow your bookkeeper to focus on the more important aspects of your business. Square provides a handy and free (if not particularly powerful or well-reviewed) piece of software called Sync with Square that imports your POS data into QuickBooks Online on a daily basis. This article is to show you how to create an account for your bookkeeper with just enough access for them to get this done themselves.
- Prepare Square for your bookkeeper.
- Create a Bookkeeper role.
- Add your Bookkeeper as an Employee
- Get QuickBooks Online ready for linking your Square Item List
- Using Sync with Square
Create a Bookkeeper Role
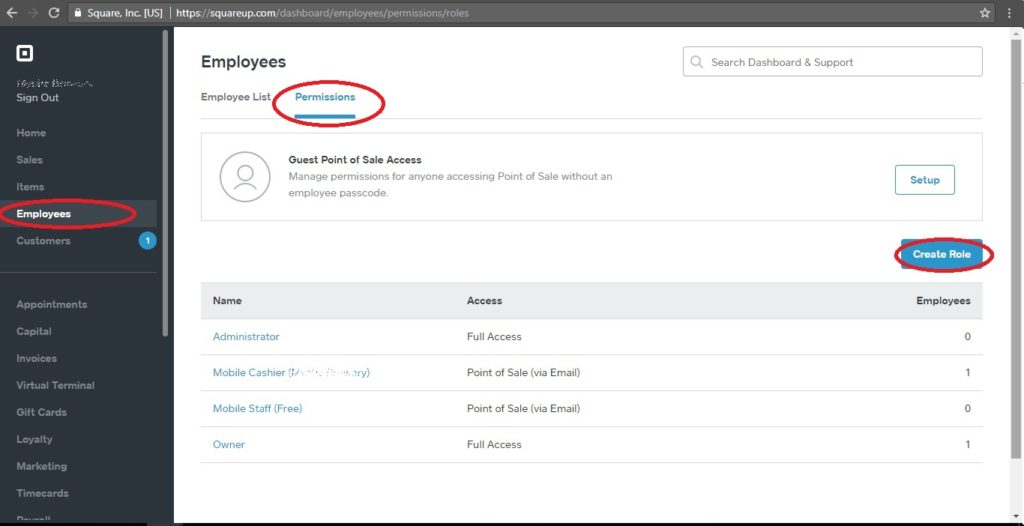
From your Admin Dashboard, select “Employees” on the left, navigate to the “Permissions” tab, then click on “Create Role”
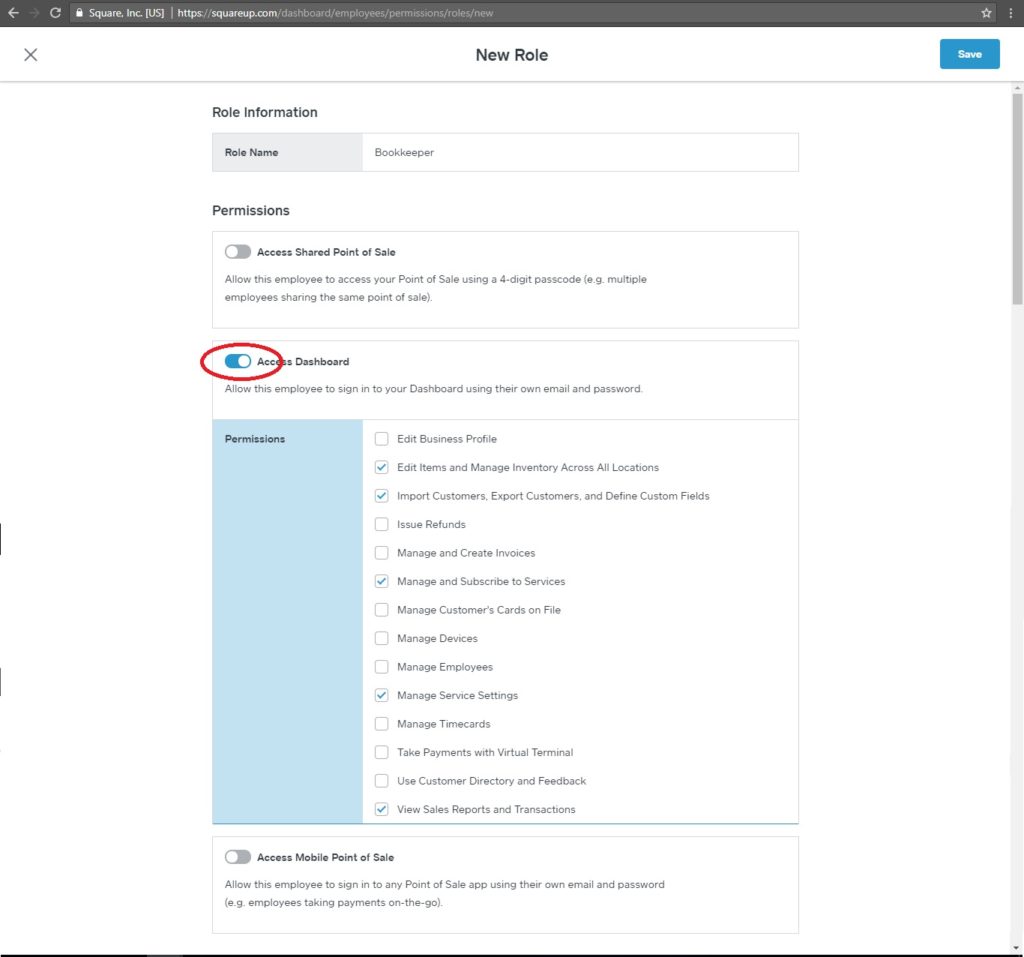
Name the Role “Bookkeeper” and allow for the following access:
OFF – Access Shares Point of Sale
ON – Access Dashboard
Check the following: “Edit Items and Manage Inventory Across All Locations”, “Import Customers, Export Customers, and Define Custom Fields”, “Manage and Subscribe to Services”, “Manage Service Settings”, “View Sales Reports and Transactions”
Leave the following unchecked: “Edit Business Profile”, “Issue Refunds”, “Manage and Create Invoices”, “Manage Customer’s Cards on File”, “Manage Devices”, “Manage Employees”, “Manage Timecards”, “Take Payments with Virtual Terminal”, “Use Customer Directory and Feedback”
OFF – Access Mobile Point of Sale
Then, hit “Save” in the top right.
Add your Bookkeeper as an Employee
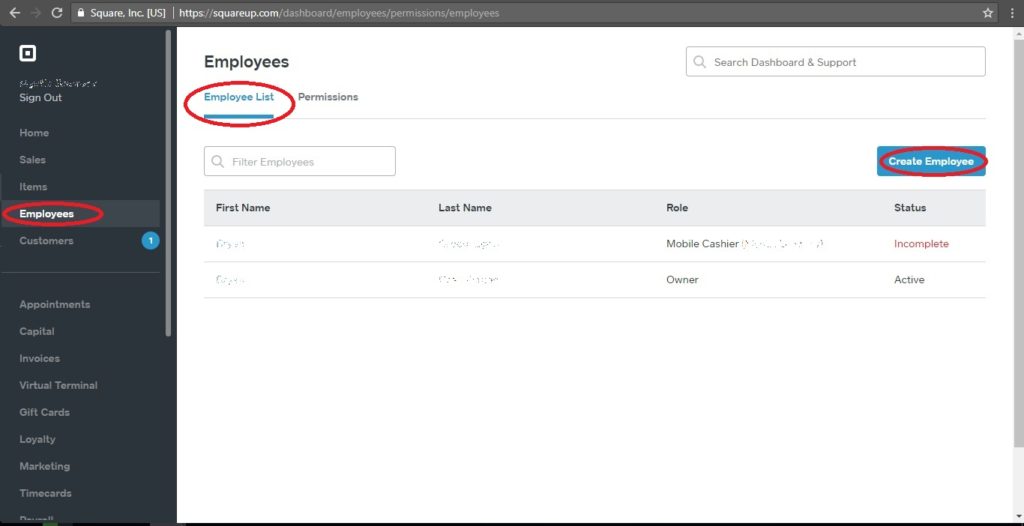
Again, from your Admin Dashboard, select “Employees” on the left, navigate to the “Employees List” tab, then click on “Create Role”
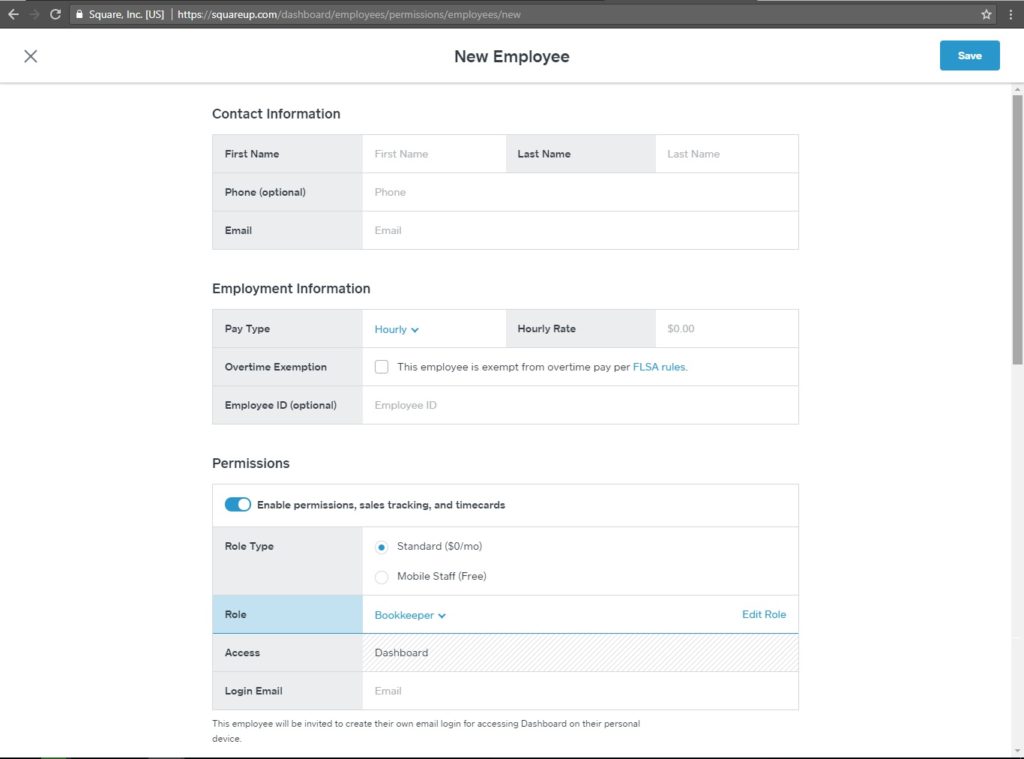
Enter the basic information about your bookeeper. “First Name”, “Last Name”, “Email”. Pay Type doesn’t matter so long as you select one (Hourly has fewer options to ignore).
ON – Enable permissions, sales tracking, and timecard
Role Type is “Standard ($0/mo)”
Role is “Bookkeeper”, which we created above.
Login Email is the same as Email.
Then, hit “Save” in the top right.
Congratulations! Your bookkeeper now has access to the basic information they need to continue with setup!
On to Part 2 – Get QuickBooks Online ready for linking your Square Item List