You use Square to power your Point of Sale and QuickBooks Online for your accounting. Getting them talking can save loads of time and allow your bookkeeper to focus on the more important aspects of your business. Square provides a handy and free (if not particularly powerful or well-reviewed) piece of software called Sync with Square that imports your POS data into QuickBooks Online on a daily basis. This article is to show you how to prepare your QuickBooks for Square’s data.
- Prepare Square for your bookkeeper.
- Get QuickBooks Online ready for linking your Square Item List
- Set up Sales tax
- Disable other integration methods
- Connect the bank account to use with Sync with Square
- Import your Square products and services into QuickBooks
- Using Sync with Square
The Intuit Quickbooks Sync With Square FAQ on Square contains a couple of broken links to the Switching to the Sync with Square app help page on QuickBooks Online’s Support Forum. The information hereafter is essentially a graphical representation of the latter. You are encouraged to read the original.
Set up Sales tax
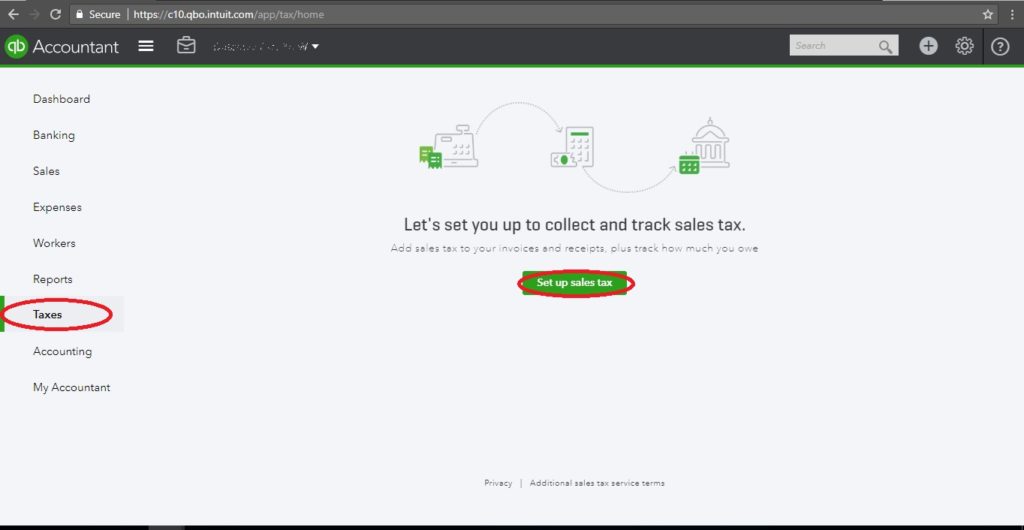
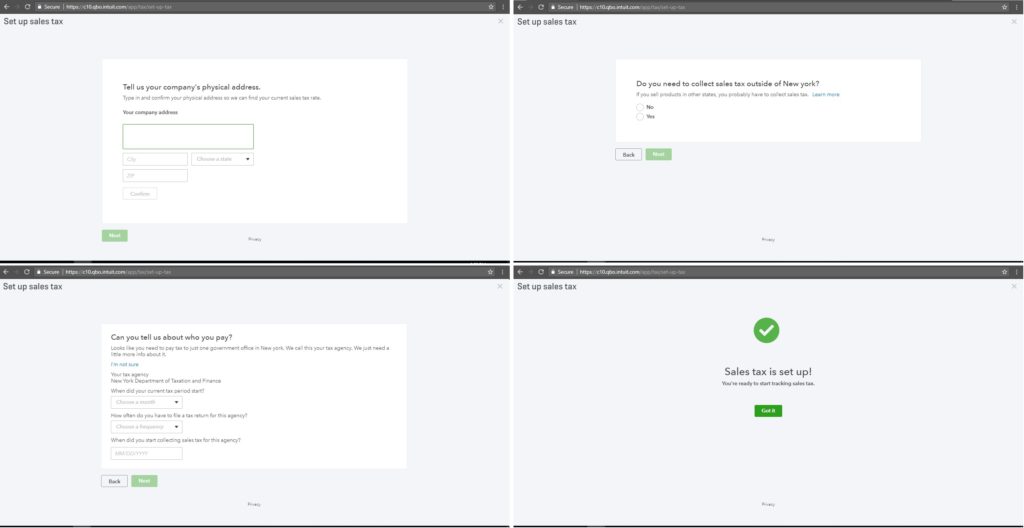
Select “Taxes” on the left, then “Set up Sales tax” if this is the first time you’ve clicked here before. You’ll quickly be walked through a couple of windows asking very basic questions to finish your setup.
Or perhaps your window looks something closer to this:
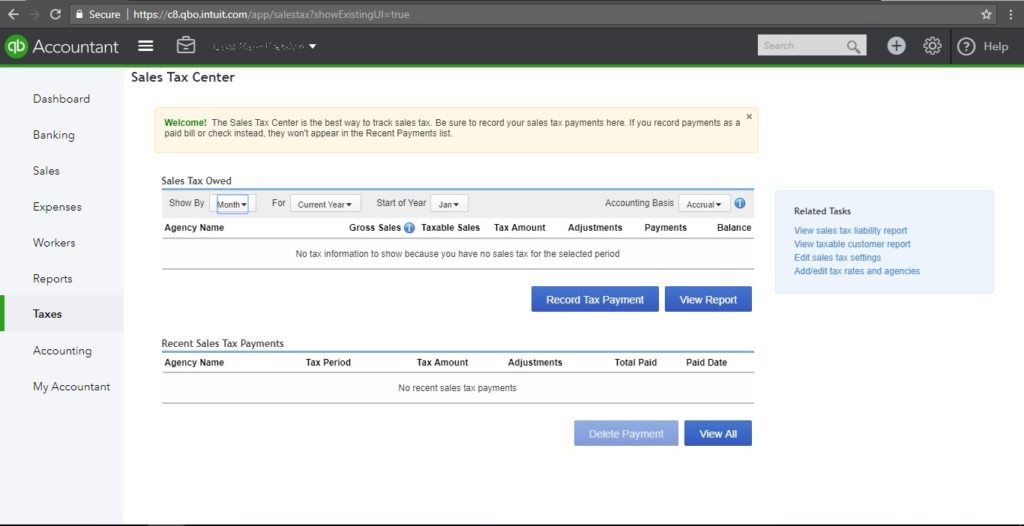
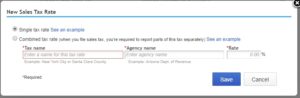
In this case, you’ll want to select “Add/edit tax rates and agencies” on the right first. When you click on “New” on the next screen, you should get a pop-up window like this. Simple or Combined tax rates depends on your location. In Massachusetts, there’s a single 6.25% state-wide sales tax and very few (if any) local add-ons. For Montgomery, Alabama, there is a 4% state tax, a 2.5% Montgomery county tax, and a 3.5% Montgomery city tax collected as a
Combined 10% sales tax. You’ll have to investigate to set this up properly. Use your Square settings as a guide.
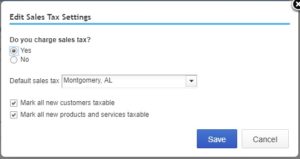
Once you have your tax rates and taxing authorities setup, you have to select “Edit Sales Tax Settings” to actually collect the tax. You’ll set the default sales tax and a couple other default settings as pictured to the left.
Disable other integration methods
If you’re collecting the Square data another way, turn if off. Duplicates will be a headache to identify and remove.
Connect the bank account to use with Sync with Square
Make sure that the bank account that is receiving your Square deposits appears in the Banking section. It does not need to have the bank feed setup or working so long as you have some way to import the data. Square will be staging the deposit transactions for you using this account.
Import your Square products and services into QuickBooks (optional)
If Square products or services are not specified in your QuickBooks, Sync with Square categorizes the item with the default name Square Item. You can set up how to categorize Square products and services on the Defaults for Unmatched Items page. It’s much easier to have things setup right from the start.
Square keys off of the item name so “Pulled Pork By Pond” will be different than “Pulled Pork By Pound”. Capitalization doesn’t seem to be that important. If an item name is changed on Square, QuickBooks will recognize it as a new item. Items can be merged after the fact.
Prepare Product Categories
Square uses categories so you may as well duplicate them in QuickBooks. From the Gear Icon (upper right), select “All Lists”, then “Product Categories”
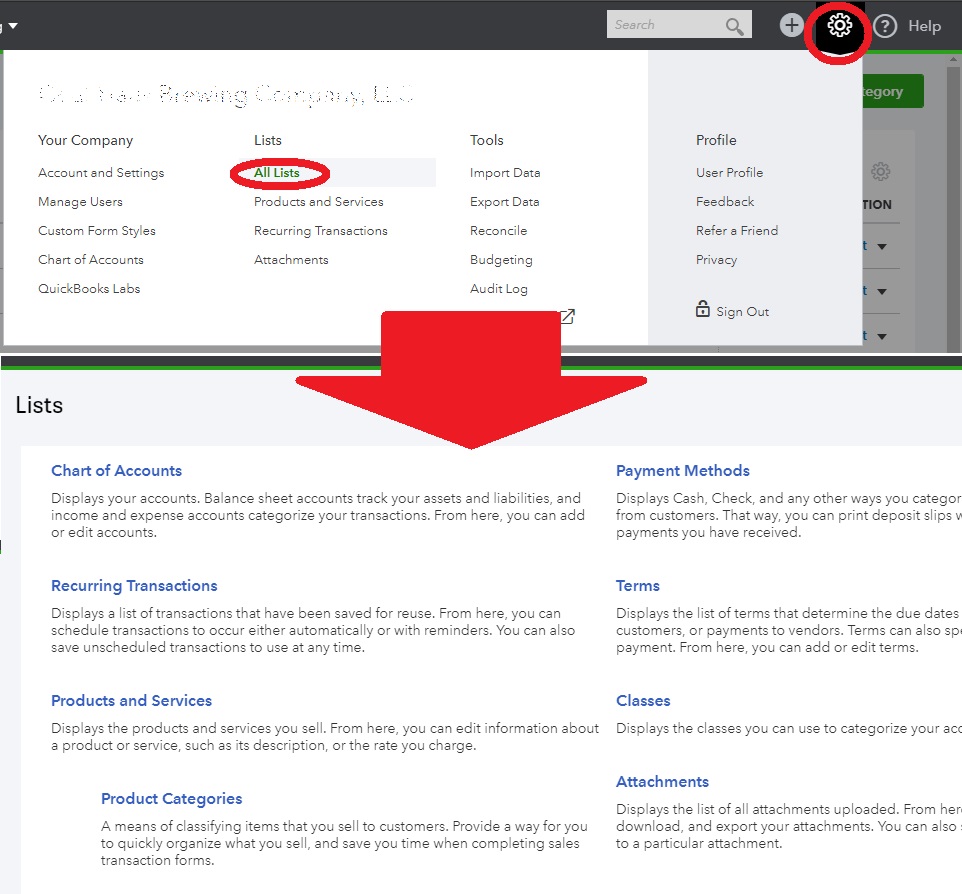
![]()
There is no Import mechanism for Product Categories so keep tapping the “New Category” button and entering them manually. This is not strictly necessary but will allow for easier reporting in QuickBooks without having to load Square.
Prepare Products and Services
Next, from the Gear Icon (upper right), select “All Lists”, then “Products and Services”. There is a fairly robust Import mechanism for these and we *ARE* going to use it, but first we’re going to manipulate the data a bit.
PROTIP: If you’re locked out of the Square Item list and cannot export it, run a sales report by item for the past 365 days. It’ll capture all the items you’d be importing. Be aware of duplicates (changed categories, for example) as this will cause errors in import.
In Square, on the Left pane, select “Items”, then the “Item Library” tab mid-screen, then click “Export” towards the right.

Export to Excel is recommended although .csv is more universal. If working with a .csv, the most important thing is to make sure that every cell is imported as TEXT, just the way it is. Many programs will try to tag certain things as dates or numbers, dropping leading zeros or changing date formatting. The Excel option preserves the proper formatting, even when importing to Google Sheets.
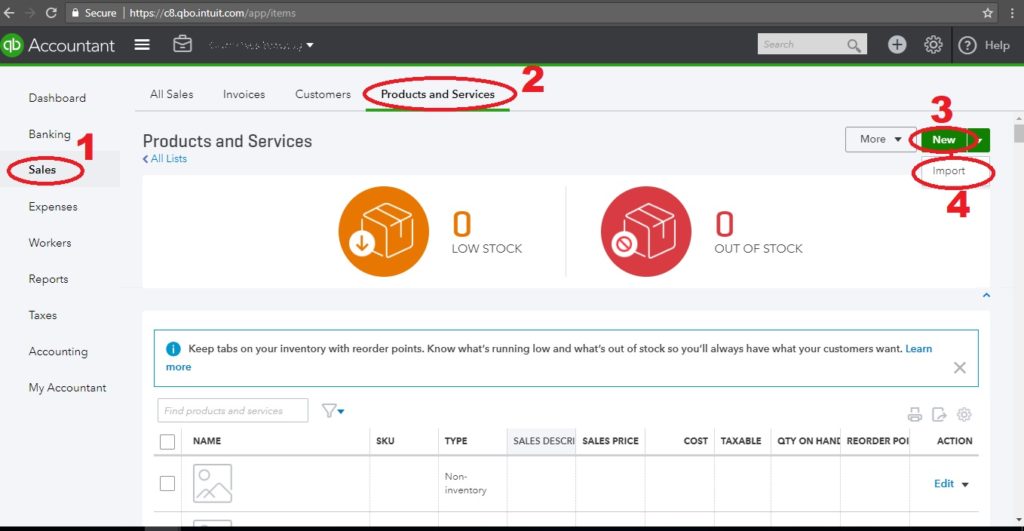
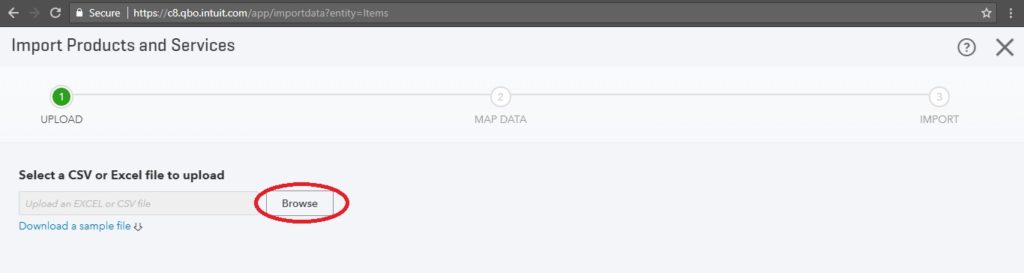
Before we start manipulating this data, let’s look at what the data needs to look like when we’re done. We can get this by exporting the sample file. Select “Sales” on the left, then the “Product and Services” tab, then click the down arrow next to “New”, and finally “Import”
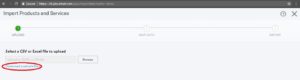
You’ll be back on this screen after we finish manipulating the data. For now, select “Download a sample file”. Below you can see the two files’ columns compared. On the top is the Square Item List export and on the bottom is QuickBooks sample file. Suggested mappings are included.
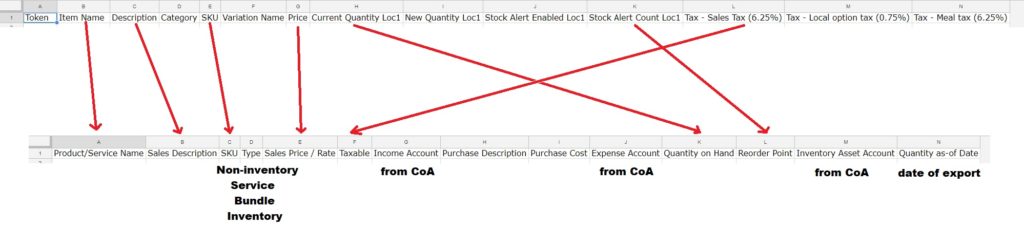
The five columns that should be filled in are Type, Income Account, Expense Account, Inventory Asset Account, and Quantity as-of Date. We encourage you to use Square to track inventory and let QuickBooks handle the accounting.
Type – We recommend using Non-inventory for physical things you sell and Service for non-physical things you sell.
Income Account – From your Chart of Accounts, this is where the money goes. Some CoA’s just use a single “Revenue”. Some brake it out to separate different kinds of income.
Expense Account – Doesn’t really matter unless you fill in the purchase cost. For each item you sell, you can record some cost for it. We recommend that setting this up only if you are tracking inventory in QuickBooks. Usually a COGS account.
Inventory Account – Doesn’t really matter unless you fill in the purchase cost. We recommend that setting this up only if you are tracking inventory in QuickBooks. Items purchased via Purchase Order or Expense accumulate inventory. Sales move this inventory to the expense account.
PROTIP: If you don’t have any item descriptions, copy the Category column here. It will make it much easier to sort your items into Categories later.
Once you finish manipulating your data, it’s back to the Item import screen (Select “Sales” on the left, then the “Product and Services” tab, then click the down arrow next to “New”, and finally “Import”). From here, click “Browse” to select your file.
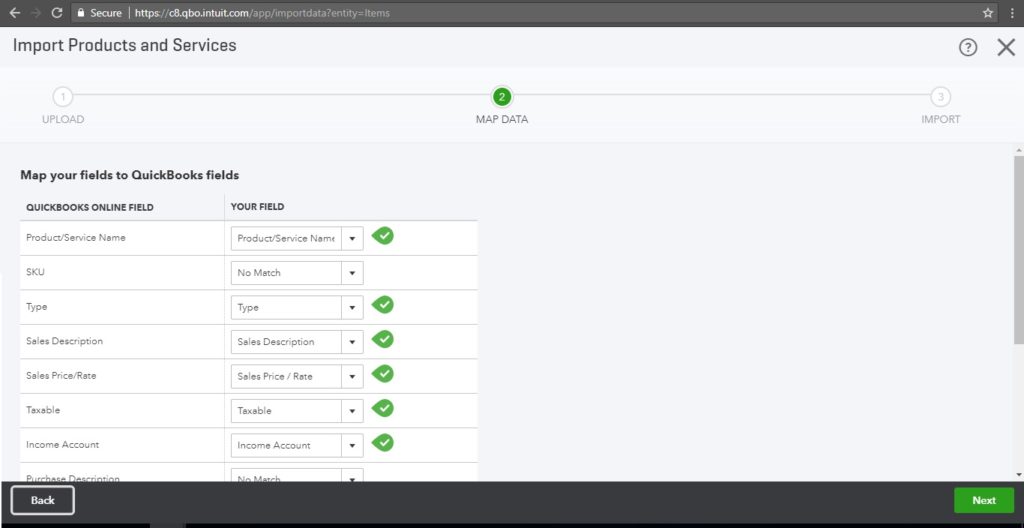
Once selected, click the green “Next” button in the bottom right. Most of the fields should map intuitively. Verify and hit the “Next” button again.
Next you’ll be asked to verify the items for import. Click “Import” on the lower right. If there are any errors, they’ll be one last screen asking you to make final changes. Once these are resolved, you’re done! Almost.
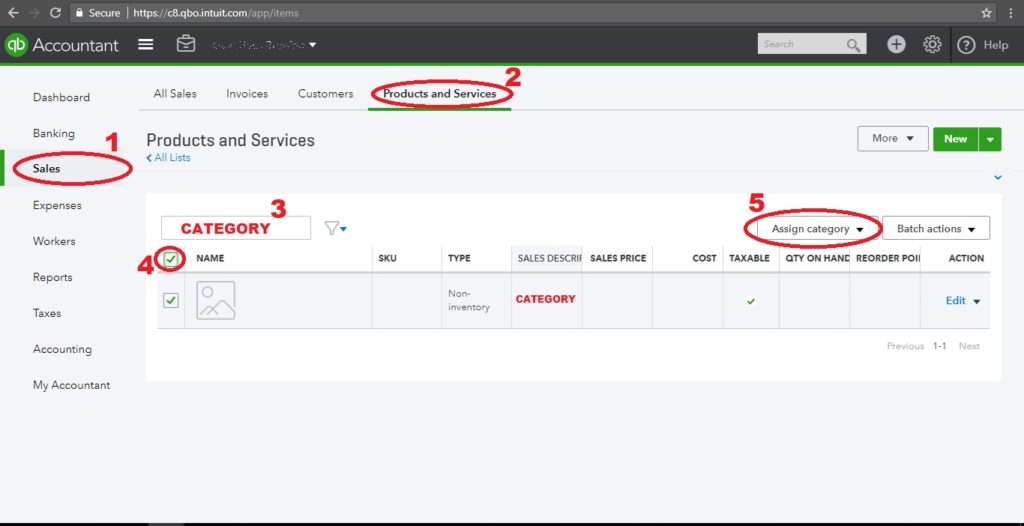
The final task is to sort your newly imported Items into the Categories you’ve setup. If you followed the PROTIP above, this is easy! If not, you’ll have to search and define them manually. Simply navigate to your Products and Services list (“Sales” on the left, then “Products and Services”), type the category name in the search box, select all (or some subset thereof), then assign the category using the drop-down “Assign category”.
Fin!